5 Tips to Improve Your Mixes – Rick Beato
June 9, 2020
Card sleeve CDs The Time Stealers Newcastle
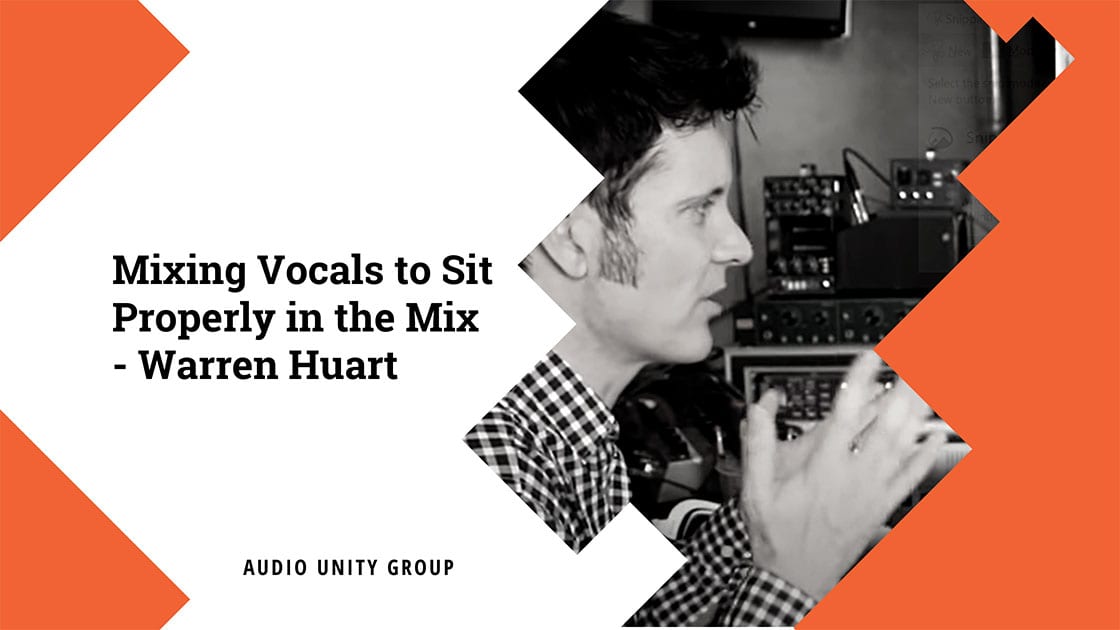
June 20, 2020Mixing Vocals to Sit Properly in the Mix - Warren Huart
Warren shows how to mix vocals so they sit properly in the mix. He shows the automation he is doing, all of the plug-ins, and some extra tricks to get the vocal to stand out and always be present.
Download FREE pdf
mastering chain cheat sheet
Use this 10 step mastering chain sheet to improve your mastering processes and to make sure you do right things at the right time!
DOWNLOAD PDF[00:00:02.030] – Speaker 1
Hi, it’s Warren. Shewart here with producerpro. Com. Thank you ever so much for watching today, we’re going to talk about vocals. I’ve done quite a few different videos over the last few few months since we’ve been running the channel on vocals, but I’m going to get into greater depth vocal mixing and just show you all the little tricks I do. So this is our comprehensive vocal mixing video, and we’re going to use a track called It All Comes Back Around. We just did a video on it, and I did touch on the elements, but I’ll go a little slower and I’ll talk about all the little details I did.
[00:00:41.510] – Speaker 1
So please enjoy this and please ask millions of questions, et cetera. And I will go into as much detail as possible. Okay, so let’s get started. Okay. So what we have here is the song All Comes Back Around. It’s Elena Blair. We featured a couple of her songs in our how to Arrange series, and I thought of this one just because it’s a relatively simple production. There’s only a couple of loop ideas. There’s just some strings, piano bass and one stereo guitar idea, so it gives us a lot of room to hear what I’m doing in the vocal.
[00:01:17.510]
So.
[00:01:19.310] – Speaker 1
First of all, let’s just talk about the vocal. The vocal has to feel present in the mix at all times. I want to hear the vocal in a simple piano vocal song like this. I need every inflection of her voice to come through. So let’s have a listen to the mix. For instance, that’s the first line, and it’s really imperfect, but it’s imperfect in a beautiful way. She honestly had a little bit of a sore throat she’d been singing. She had done, and I often ask people what’s one of the most famous vocals of all time.
[00:02:01.830] – Speaker 1
And obviously there’s a lot of debates over to what that might be. But one of the most famous beetle vocals, of course, is twist and shout and twist and shout was the last song that John Lennon sang after singing for 17 hours or 13 hours, whatever it was when they did their first album, they did it straight. So he’s got that same little baby now, and everybody identifies it, and they go, oh, my God, it’s so passionate. And he’s ripping his voice. And it’s because he was at the end of a very long, long day of singing ten songs.
[00:02:31.830] – Speaker 1
So his voice was really worn out, and it just has that passion. So I like keeping those kind of elements. So on my vocal. Comp, I deliberately chose that first line for me. The first thing I will say before we get into any details, and this will be our number one thing is, when you’re comping compiling the vocal, find the moments that are not just in tune or in time, but have a lot of charisma. We identify with the imperfections in the voice as much as we identify with the tuning and the timing.
[00:03:12.070] – Speaker 1
So for me, that is a great first line. It’s just her and me playing piano, little bit of breath at the end of that as well. See, I love all of that stuff. There’s a little kind of moments where you hear the compression choking and bringing out the breath a little much. But you know what? I like all of that. It draws me in. It makes me want to hear her vocal. So up through that first verse, let’s just concentrate on that area. That is all just a vocal and piano.
[00:04:12.490] – Speaker 1
After compiling it, what do we do? I did some volume writing, so before even all of this compression and EQ and effects or whatever, the first thing I did was bring out different lines. So here is the volume automation. This is over the whole song. If you look here, there is a tonne of volume automation where when there’s little lines that maybe there’s breaths and the way that she phrases the end that I want to exaggerate. So I am sitting there and I’m automating the vocal.
[00:04:45.070] – Speaker 1
So it’s a little bit harder work than just sitting there and sending direct volume in and compressing and EQing. Just that I’m actually pushing it first, but I’m doing lots of things on this vocal. So this vocal is good because it shows a lot of different techniques that I do.
[00:04:59.770]
Okay.
[00:04:59.950] – Speaker 1
So we’ll just concentrate on this first verse. So look, you can see here the lines are all stronger, and here it’s weaker on the end. So I’m actually pushing the vocal.
[00:05:14.650] – Speaker 2
There’s a space between.
[00:05:20.090] – Speaker 1
I love that. So that between us is kind of whispered. And so here it is. It’s very straightforward. You can see here where it’s hitting the compression a little harder. So I pulled it down because all of this stuff is going into a vocal sub. So now I’ve got an R box across it here.
[00:05:39.650] – Speaker 2
There’s a space between.
[00:05:44.390] – Speaker 1
Watch it again. Listen, there’s a space between. So there’s up to five DB’s worth of compression going when she hits it really hard.
[00:05:57.170] – Speaker 2
There’s a space between.
[00:06:01.010] – Speaker 1
Maybe six at one point. I do like the sound of the arlox. It adds a lot of fatness. Try it out.
[00:06:09.950] – Speaker 2
There’s a space between.
[00:06:14.390] – Speaker 1
That’S just as nice. Just a little.
[00:06:17.390] – Speaker 2
There’s a space between.
[00:06:22.710] – Speaker 1
Yeah, it’s doing just enough for me.
[00:06:25.230] – Speaker 3
Okay.
[00:06:25.590] – Speaker 1
So what we got is some volume automation. And then if you look here, for instance, here’s a line which is quite powerful. It’s actually being cut down quite dramatically.
[00:06:37.770] – Speaker 3
Or is it mixed with a little fade and destiny?
[00:06:44.490] – Speaker 1
So what we did on this line, if we Zoom in just on this line, we brought it down where it’s going too heavily into my bus, pushed it up here, and then exaggerated this line at the end for the breath.
[00:06:57.210] – Speaker 3
Or is it mixed with a little fade and destiny?
[00:07:05.410] – Speaker 1
I wouldn’t be afraid to go in and do this even just a little bit. See this area here and push that a little bit.
[00:07:12.490] – Speaker 3
Have a listen or is it mixed with a little fade and destiny.
[00:07:20.650] – Speaker 1
Round the air a little bit, maybe bring it down a little bit. These are subtle moves. Hopefully it comes across on YouTube.
[00:07:28.090] – Speaker 3
Or is it mixed with a little fade and destiny.
[00:07:34.870] – Speaker 1
And this ending here? We could even exaggerate it a little more. We could do this. See on my volume automation just bringing it up here or is it mixed with a little fade and destiny now compression can do all of these things. However, each compressor has its own sound. So I was talking in the all comes back around video about how the great great engineers such as Bruce Botnick and stuff. Bruce would do this and all the great guys from the 50s and 60s would do these on Fader moves.
[00:08:10.750] – Speaker 1
They would sit, they would have a chart, they would have all the lyrics written down and they would literally write and I’ve done it many times myself. They would write down where the singer is pushing and pulling. And before, like sophisticated VCA compressors, where compressors had much slower attack and release times like La Two, A’s and Fairchilds, which sound wonderful, but they don’t have fast and attack and release times. So they would do this manually. They would sit there on the Fader and they would sit there and they push and pull the vocal so it didn’t distort and it kept the vocal clean at all times going to tape.
[00:08:44.350] – Speaker 1
So this is us doing that. This is us reproducing and replicating it. And the reason why I’m doing it on the vocal initially is because I’m then going into a sub down here, so I want to control how it’s being compressed. Okay. So even with all this vocal riding here, I felt like I just wanted to pull back a little bit on the trim, so there’s a 1.7 DB pull back. Now. The reason why I did that is I don’t want to send a clipping signal from one plugin to another.
[00:09:14.470] – Speaker 1
You can end up with compression, et cetera and limiting sending a nice level signal to your master bus, and it doesn’t look like it’s clipping at all, but it still sounds bright and aggressive. That is because it’s probably clipping from one plugin to another. You don’t want to send a clip signal into the compressor and then have the compressor pull it down so it does not sound, but looks like it’s not clipping. It’s important to send a signal from one plugin to another. That doesn’t clip going into it because, yes, the compressor will pull it down so that the output of the compressor isn’t clipping, but the signal that’s gone in may have clipped.
[00:09:51.130] – Speaker 1
Hopefully that makes sense. That’s a very important thing for me. So I trimmed that down just to give myself some room. Now the next thing I’m using is a vocal rider, which is actually a simulation of what we’re doing. Watch it here.
[00:10:06.310] – Speaker 3
Or is it mixed with a little fade and destiny?
[00:10:20.290] – Speaker 1
See how great that is? It’s doing a little bit more of what I’m doing and you can control it from the top and the bottom, the range you can have it do very small movements. I’m having it do very large movements, but that’s the next thing. After my volume automation, I discovered this plugin. It is fantastic and it’s exaggerating what I’m doing next is it’ll leak you. I pulled out some of the pure midrange at 830. There’s a base definition there. There is a little hockey on the piano, and I just felt like they were all beating each other up there.
[00:10:55.330] – Speaker 3
Or is it mixed with a little fate and death?
[00:11:00.670] – Speaker 1
It’s a little nosy if I take it off or is it mixed with a little fate? A little? So I pull out that or is it mixed with a little fade and destiny just a little tiny pull out that it’s like a couple of DB. The queues kind of wideish and then there’s a nice presence lift here at seven K just to give it over the top and a gentle roll off. We don’t need the super lows in there, but it’s not steep. It’s only 60 B and octave, and it’s a nice gentle low roll off.
[00:11:39.010] – Speaker 1
I don’t do really aggressive low pass Philtre or high pass Philtre work top and bomb. I don’t do that unless I’ve got like, key stuff. If you’ve got really dense EDM tracks and everything is massive, then sometimes you have to sculpt them. But on organic natural analogue instruments like vocals and acoustic guitars and basses and drums, you won’t see me do really aggressive high and low passes. You’ll see me do really soft, gentle ones just so they sit in because if you treat them like a synthesiser, it’ll end up sounding very harsh.
[00:12:10.990] – Speaker 1
The only other time I’ve seen people do that is maybe on heavy, heavy rock guitars, where you might have to get aggressive on some of the super lows because it’s messing in the way, but otherwise use very gentle low and high pass philtres. Okay, next. And most importantly, now I did a little presence boost, which was on the vocal and made it sound really beautiful. I did a little DSL.
[00:12:50.030] – Speaker 3
Or is it mixed with a little fade and destiny.
[00:12:56.030] – Speaker 1
So it’s taking out the exaggerated S’s because I just added the seven K, so it’s going to exaggerate them a little bit. But I want the air on the vocal at all times, but when it gets exaggerated, I’m pulling it back and it’s at about six K.
[00:13:15.770] – Speaker 3
Or is it mixed with a little fade and destiny?
[00:13:21.290] – Speaker 1
It’s subtle. It’s doing like two or three DB’s worth of reduction. And then I went to little req and added just a little bit more top again, I tend to do two or three EQ plugins and just shape it lightly around the instruments. You can simulate it all with one. However, I’ve learned this from working with lots of many great mixers. Michael Brower, for instance, is obviously very well known for cold play, and a bunch of other very successful acts will do multiple amounts of EQ and compression, but doing little tiny amounts and that will give you a much more rounded and less process signal than when you take one plug in and boost huge amounts of EQ and pull out huge amounts of EQ.
[00:14:03.170] – Speaker 1
This is a very gentle presence lift. So again, another.
[00:14:15.830] – Speaker 3
Or is it mixed with a little fade and destiny.
[00:14:21.530] – Speaker 1
Just a gentle amount of compression there. The ratio is only 2.2, so it’s like it shows us compressing, but we’re only talking.
[00:14:50.630] – Speaker 3
Is it mixed with a little fade and destiny?
[00:14:56.630] – Speaker 1
See, at that point the movement is very subtle. We’re talking like less than two to three DB of movement, but it’s keeping that vocal nice and consistent. So dropping the piano against it just kept that vocal nice and consistent in the front. Now you can do all of the vocal riding stuff manually. If you don’t have the plugin, you could do all of this vocal writing stuff here on our channel there. In fact, sometimes you can copy your vocal automation down onto your sub and do it that way instead of using very harsh compression because you saw I was using little tiny bits of compression or putting a limiter or anything like that across it.
[00:15:44.430] – Speaker 1
I’m doing more Fader movement. I’m doing more Bruce Botnick, even though he was probably also using an La two A or a fair child as well, going in and then maybe an La, two A and a fair child on a mix again, using two or three compressors in two or three compressors on the out. He still was using the Fader. It gives you a little bit more control. It means that when it’s hitting the compressor, it’s hitting it evenly. So if we go back to our R comp here, watch it.
[00:16:14.110]
Fading.
[00:16:18.130] – Speaker 1
See, even right up to the very end. Even when the vocal is dropping down here, it keeps a consistent two to three DB’s worth of compression until it just gets to their destiny, their breath at the very end. So you know that we’re sending a nice even signal into our compressor and we’re bringing it forward.
[00:16:41.450] – Speaker 3
Great.
[00:16:41.810] – Speaker 1
Keeps that vocal ever present. Okay, so let’s take the piano out for a second. Let’s see what else we got going on now. I’ve got my vocal distortion sub here. So what I’m doing is I’m using the reason why I put a DSR across it in the first place is because I don’t want this to be super harsh and bright on my distortion and then compressing the signal. This is coming straight off our lead vocal. So our same bus here 123 is sending to this as well. So we’re compressing the signal.
[00:17:16.490] – Speaker 3
Or is it mixed with a little fade and Destiny?
[00:17:21.230] – Speaker 1
That’s an even signal. So let’s listen to just that element. Open this all up and we’ll hear them all individually. Okay, so here’s just the distortion sub. The last thing on it is the lofi. Now the lofi plugin comes with protoles. Now I talked about this before in another video, but I’ll explain it again. Why do I do this schnezzle? Why do I do this whisper and the distortion and the octave? Well, first of all, I’ve been doing it a long time, so I found this to be very effective, but I work a lot with a guy called Jack Douglass and Jack produced obviously Aaron Smith and a whole bunch of other people.
[00:17:56.750] – Speaker 1
But one of the tricks he did with John Lennon’s vocal was he would take a crowd noise of people cheering going, and he’d put it against John Lennon’s vocal, but he would gate it to the lead vocal. So John would like to imagine all the people there like this and it’s very low level, and it’s just this level of excitement, like going on. But it’s gated to the vocal. Now that’s a difficult trick to do. I didn’t have a great vocal simulation of a crowd going, so I simulated it with a distortion.
[00:18:34.290] – Speaker 1
So all it is is just energy behind the vocals. I hear the DeEsser and et cetera on it.
[00:18:46.770]
Destiny.
[00:18:47.910] – Speaker 1
So it’s just a little aggression. You just add some aggression behind it. Next up is our vocal octave sub. That literally is here. You see here I’ll bring into the middle an octave lower on the vocal super buried in there. Yeah, it’s terrible sounding on its own. Dreadful sounds like bielzebub, but it’s buried low against it just to give it some width just to make it feel just a little stronger. Here’s the two things together. Distortion and the vocal part last, but no means less. Least is the photo, which is our vocal whisper track, which gives us some extra air on the vocal here’s all three together.
[00:19:49.530] – Speaker 1
Drop that in against the lead vocal.
[00:19:52.170] – Speaker 3
Or is it mixed with the little fade and destiny or is it mixed with a little fade and destiny?
[00:20:04.410] – Speaker 1
Let’s add in. Just listen to it on its own. Our old friend distorted our vocal thickening trick. You can go to the vocal thickening video for that.
[00:20:32.550] – Speaker 3
Is it mixed with a little fade and death?
[00:20:36.030] – Speaker 1
Fantastic. Thank you so much for watching. I hope you had a marvellous time. Please leave some questions and comments down below. A lot of these tricks are used by a lot of great mixers. I borrowed them, stolen them. We’ve swapped the ideas. There are unique ways to make the vocal appear more breathy and opensounding and more in your face in the mix. Like I said, I’ve been judging a mixing competition, and you guys have been doing an incredible job. I cannot believe the quality of the work out there.
[00:21:10.650] – Speaker 1
I watch a lot of videos on YouTube with different guys and girls talking about their mixing techniques. And to be honest, most of the stuff I’ve been getting is better. It’s just really good. Your mixes are fantastic. You’ve been working really hard. I’m very impressed. So please leave questions. Leave comments. Let’s have a great discussion about this and please subscribe to the email list that produces like a pro dot com and have a marvellous time recording.
Hey I’m Tom, I’m a mastering engineer here at Audio Unity Group. I mostly look after Vinyl production and audio side of things. I hold a bachelor’s degree with honours from Kingston University in London. I love audio and helping others create outstanding-sounding records.


